
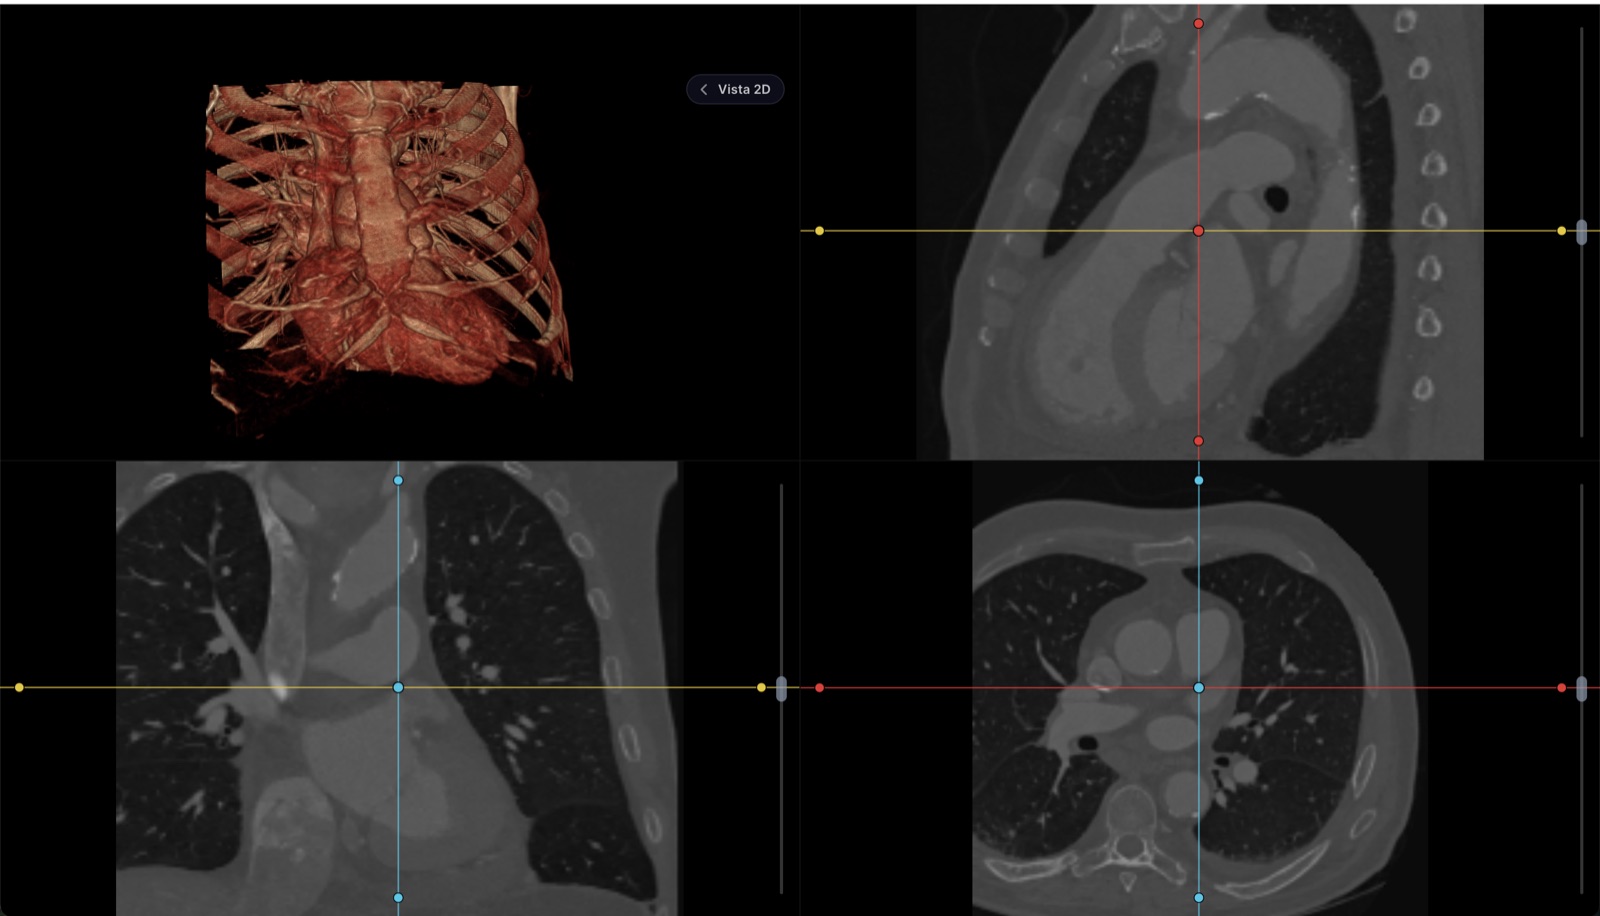
To view it, your study is not uploaded anywhere
The file is read and drawn inside your browser. It doesn't travel to our servers. Neither do your measurements or your report: they live in this tab's memory and vanish when you close it, so they leave no trace even on a shared computer. The only thing that leaves is what you choose to send: if you request the link for your doctor, the study is encrypted on this very device before upload, the key travels inside the link and never reaches us, and the file is deleted when it expires. We do keep a tally of the visit itself — how many files you opened, how much they weighed, how long it took to render and whether anything failed — so we know the viewer is doing its job; never the file names, never anything inside them.
Not for primary diagnostic reading
A formal diagnosis is issued on radiology-calibrated monitors. This tool is for reviewing, measuring, comparing and walking your patient through the study — not a replacement for the reading station.
Free, no account
View any DICOM or NIfTI series, or the PDF that comes on the CD
Window and level, zoom, cine and series comparison
Measurements in real millimeters, angles and annotations
Multiplanar reconstruction (MPR) and 3D view
Write the report and export or print it
Download your own files as a zip
Needs an account
Save the study to a patient's record
File the signed report next to the visit note
Keep measurements and key images across sessions
Receive studies straight from your machines via worklist
Share the study with the patient without burning a CD
Quick answer
How to open your study, step by step
Gather the study files
Copy the whole folder from the CD or the USB stick to your computer. The images usually live inside a folder called DICOM or IMAGES, and often have no extension at all: files named IM000001 or similar are still DICOM. If the imaging center handed you a ZIP, use it as is.
Open them in the viewer on this page
Click “Open my study” and select every file, or drag the entire folder onto the dotted area. On a computer there is also an “Open a folder” button that loads the whole study in one go; on iPhone and iPad the system offers no folder picker, so select the files or open the ZIP.
Let the browser build the volume
The viewer splits the series, sorts the slices by their real position and reconstructs the volume on your own machine. A progress screen shows how many files it has read. Nothing is uploaded: open the Network tab of your browser’s developer tools and you will not see your study leaving.
Adjust window and level and scroll the slices
Pick the preset for the tissue you care about — lung, mediastinum, bone, brain, abdomen — and move through the slices with the mouse wheel, the arrow keys or cine playback. Without that adjustment a CT looks grey and flat; the exact values behind each preset are listed further down.
Measure, reconstruct and compare
Trace lengths and angles: they come out in real millimeters because the study carries its physical calibration. Open the multiplanar reconstruction to navigate all three planes, the 3D view to explain a finding, and the side-by-side mode to put two series next to each other.
Export before closing the tab
Everything lives in the memory of the tab and disappears when you close it. If you wrote a report, export or print it before leaving; and if it should stay archived next to a visit note, that already calls for a clinical record behind it.
What happens to your files when you open them here
Nothing leaves your computer in order to view the study. The browser reads the files you selected, decodes the slices and assembles the volume on your own machine: there is no upload to our servers, we keep no copy, and nothing remains once the tab is closed. You can verify it yourself in the Network tab of your browser’s developer tools — while you explore the study, no request carrying your images ever goes out. That is also why no account is needed: there is nothing to protect on our side, because nothing of yours is on our side.
The honest limit sits on the other side of that same design. This is a review viewer, not a reading workstation: it is made for reviewing, measuring, comparing series and walking a patient through their images, but a formal diagnostic read is done on displays calibrated for radiology, with their own quality controls. And because everything lives in the tab, your measurements, key images and report vanish when you close it unless you export them first.
Send it to your doctor: an encrypted link that expires
There is exactly one situation where the study leaves your device, and it only happens if you ask for it: the button that sends the study to your doctor. Instead of burning a CD or attaching loose files to a chat, the viewer packs the study and encrypts it on your own device before it leaves. What we store are bytes we cannot read.
The key that opens the study travels inside the link itself, in the part after the “#” — the one fragment of a URL that browsers never send to any server. So the full link, and only the full link, opens the study: not us, and not anyone who intercepts the stored file. The link expires on its own after 72 hours, can be opened a limited number of times, can be revoked whenever you want, and the file is deleted afterwards. The flip side is worth saying out loud: if you lose the link, the study is unrecoverable — there is no key to reset because we never had it.
For a patient, that means handing the radiologist’s images to a second opinion without mailing a disc. For a doctor, it means receiving a study that opens in any browser, full resolution, without asking the patient to install anything.
From CD to ZIP to NIfTI: what it opens
The viewer does not distinguish between “CT scans” and “everything else”: it reads DICOM, and DICOM is what comes out of any imaging machine. What changes is what you can do with each kind of study, because a volume of slices and a single projection image are not the same thing.
| Study | What you are usually given | What you can do here |
|---|---|---|
| CT scan | Hundreds of slices, split across one or several series | Full volume: cine, window/level, mm measurements, MPR in three planes and a 3D view |
| MRI | One series per sequence: T1, T2, FLAIR, diffusion… | Each series on its own, side-by-side comparison, and MPR when the slices are evenly spaced |
| X-ray (CR/DX) | One or two large-matrix images | Window/level, zoom, lengths and angles |
| Mammography (MG) | The four projections, in heavy files | Window/level, zoom and measurements on each projection |
| Ultrasound (US) | Still frames, sometimes in color | Zoom and measurements; color is preserved as is |
| Radiologist’s report | A loose PDF inside the CD | Opens in a panel, right next to the images |
On the file side it accepts what actually shows up in real life: .dcm files and DICOM files with no extension, entire folders, the ZIP, RAR or 7z from the imaging center — unpacked inside the browser — the CD copied as an .iso, NIfTI volumes (.nii and .nii.gz), the usual format in research, loose JPG or PNG images, and the report PDF. If what you have is a specific modality, each one has its own guide: CT scans, MRI, X-rays and ultrasound.
Window and level: the setting a CT cannot be read without
This is the difference between seeing a study and actually reading it. A CT slice measures density in Hounsfield units (HU), from about −1000 for air to more than 1000 for cortical bone: thousands of possible values, while a screen only draws 256 shades of grey. The window (window width) defines how wide a range of densities gets spread across those 256 shades, and the level (window center) sets where that range is centered. Everything outside it is crushed to pure white or pure black.
That is why the same slice looks completely different depending on the setting, and why a chest is reviewed twice: once with a lung window and once with a mediastinal window. These are the presets built into the viewer on this page, with their values:
| Preset | Level (center) | Window (width) | What it is for |
|---|---|---|---|
| Soft tissue | 40 HU | 400 HU | General look at almost any CT scan |
| Lung | −600 HU | 1500 HU | Lung parenchyma, airways, nodules |
| Mediastinum | 40 HU | 500 HU | Heart, great vessels, lymph nodes |
| Brain | 40 HU | 80 HU | Grey and white matter, ventricles |
| Stroke | 40 HU | 40 HU | Narrow window for early ischemia |
| Abdomen | 40 HU | 350 HU | Abdominal organs and fat |
| Liver | 60 HU | 150 HU | Low-contrast liver lesions |
| Bone | 450 HU | 2000 HU | Fracture lines and cortical bone |
| Spine | 250 HU | 1500 HU | Vertebral bodies and posterior elements |
| Angio | 300 HU | 600 HU | Contrast-filled vessels |
In MRI and ultrasound the pixel values are not Hounsfield units — those modalities do not measure density — so there the window is adjusted by eye, dragging with the mouse until the tissue you are after separates from the rest. The viewer starts from whatever setting is stored in the study itself, which is usually the one the technologist chose.
A DICOM viewer is not a photo viewer
This is the confusion that wastes the most time. Converting the study to JPG and opening it in a photo app “works” in the sense that an image appears on screen, but almost everything that makes a study useful is lost. A real DICOM viewer has to solve four problems that an image app does not.
Bit depth: a CT stores thousands of density levels and a JPG only 256. Converting freezes the range: you can no longer switch from a lung window to a bone window, because the data that made it possible is gone.
Physical scale: every study declares how many millimeters a pixel measures and how far apart the slices are. With that, a measurement on the image is worth real millimeters. Without it, you are counting pixels.
Series order and geometry: the files on a CD do not arrive in order. The viewer groups them by series and sorts them by each slice’s real position in the patient — the only order that reconstructs the volume without distorting it.
Reconstruction: once the volume is in order it can be cut along any plane (MPR) or rendered in 3D. That is what turns a pile of images into a study you can navigate.
The JPG is still useful for messaging a single image to a colleague. For reviewing, measuring or comparing, always keep the original DICOM files — and open them with a viewer that understands them.
Works on anything with a modern browser
Because there is nothing to install, there is nothing operating-system-specific either. The same viewer runs on Windows, macOS, Linux and ChromeOS, in any up-to-date Chrome, Edge, Firefox or Safari with WebGL2 — which in practice means any computer bought in the last several years, including a Chromebook. No admin rights, no IT ticket, no “this CD only has a Windows viewer” dead end on a Mac.
Phones and tablets work too, with one practical note for Apple devices: the iOS file picker does not offer a whole-folder option, so on iPhone and iPad you should either select all the files of the study at once or — much easier — open the ZIP directly, which the viewer unpacks in the browser. If your imaging center offers a download, ask for the ZIP; if you have the folder on a computer, compress it once and open that on your phone.
When the study should live in a clinical record
The free viewer forgets everything when the tab closes, and for a one-off look that is exactly right. It stops being right when the study belongs to your patient and you will need it again: the comparison against the scan from six months ago, the signed report filed with that visit’s note, the measurements you made last time, access from your other office. That no longer fits in a browser tab — it needs a record behind it.
It is the same viewer, mounted inside Healthy Record: you upload the CD or USB into the chart, the study stays in the patient’s history with access control and an audit log of who opened it, and the report is archived with the encounter. The trial is 14 days, in your own practice, with your own studies.
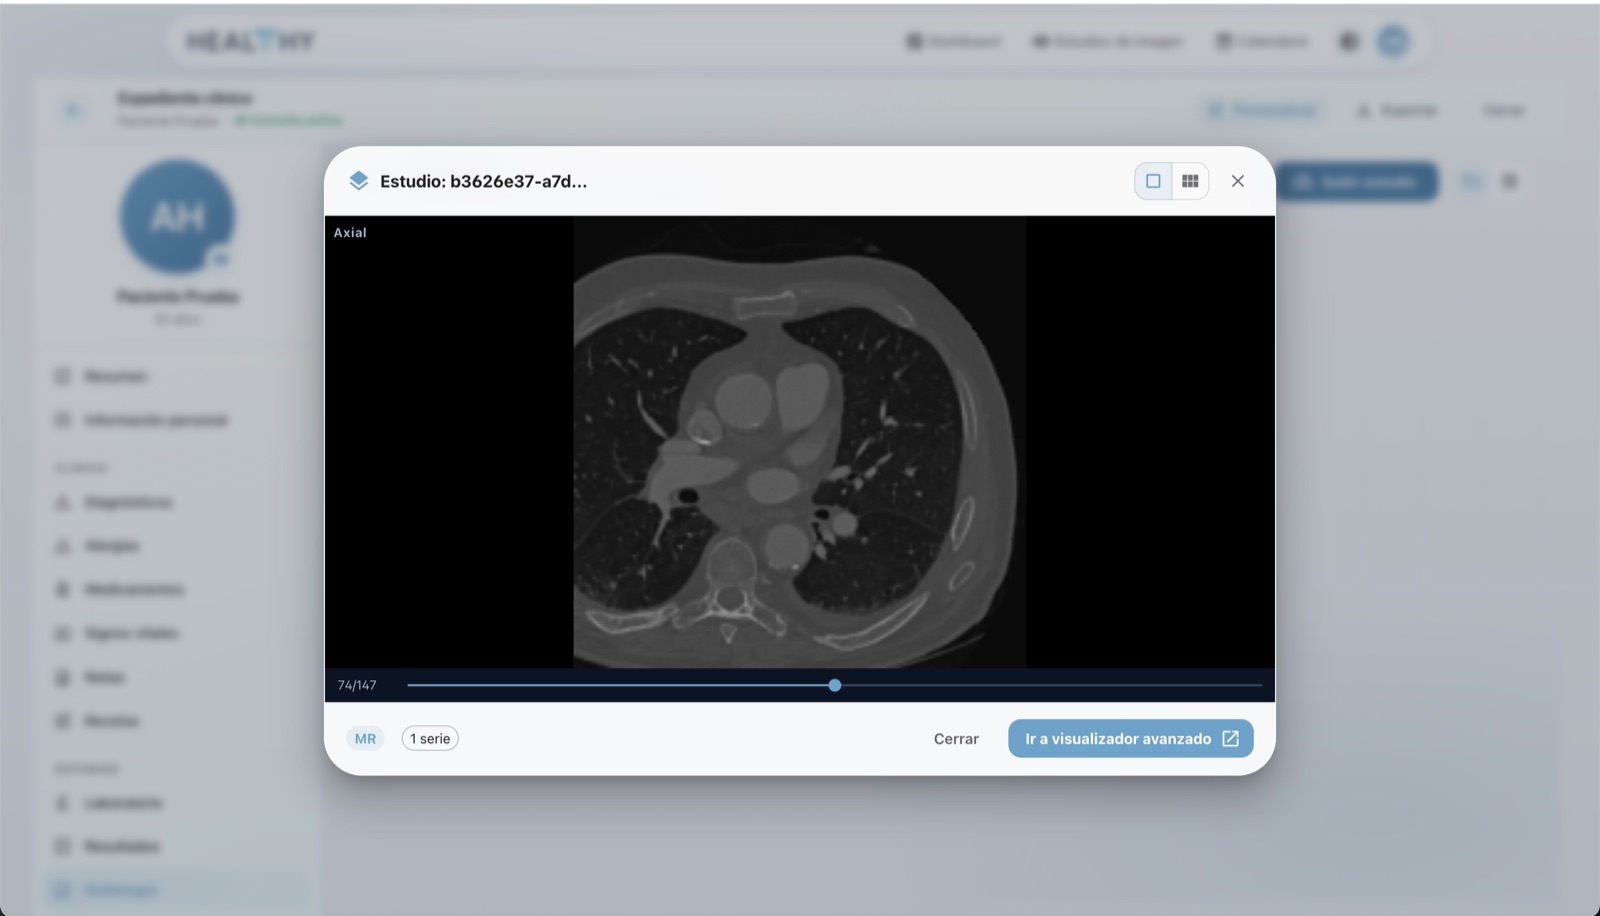
With an account, the study opens from the patient's chart — and stays there.
Frequently asked questions
Do I need an account to open a study?
No. The viewer on this page is free and works without any sign-up: pick the CD, the folder, the ZIP or the .dcm files and they open immediately, with window/level, millimeter measurements, MPR and a 3D view. An account only becomes necessary when you want the study or the report stored in a patient’s clinical record, because that no longer fits inside a browser tab.
Are my files uploaded to a server?
Not for viewing. The study is read and rendered inside your browser: it never travels to our servers, we keep no copy, and nothing remains once you close the tab. The only exception is if you ask for a link to send the study to your doctor: then it is uploaded, but encrypted on your own device before it leaves, with the decryption key traveling inside the link and never reaching us — so not even we can open it. That link expires after 72 hours and the file is deleted afterwards.
What file formats does it accept besides .dcm?
It accepts DICOM files even when they have no extension (slices on a CD are often named IM000001), full series of thousands of files, the entire disc folder, the ZIP, RAR or 7z of the study — unpacked inside the browser — the CD copied as an .iso image, NIfTI volumes (.nii and .nii.gz), loose JPG or PNG images (a photo of the film, or the “images” a portal gave you) and the report PDF.
Does it work on an iPhone or iPad?
Yes, with one practical difference: the iOS file picker does not offer a whole-folder option. Select all the files of the study at once, or — easier — open the ZIP directly; the viewer unpacks it in the browser. On a computer you can drag the folder in or use the "Open a folder" button.
Can I use it for a diagnosis?
Use it to review, measure, compare and walk a patient through their study. A formal diagnostic read is done on displays calibrated for radiology, with their own quality controls, so this tool does not replace a reading workstation.