
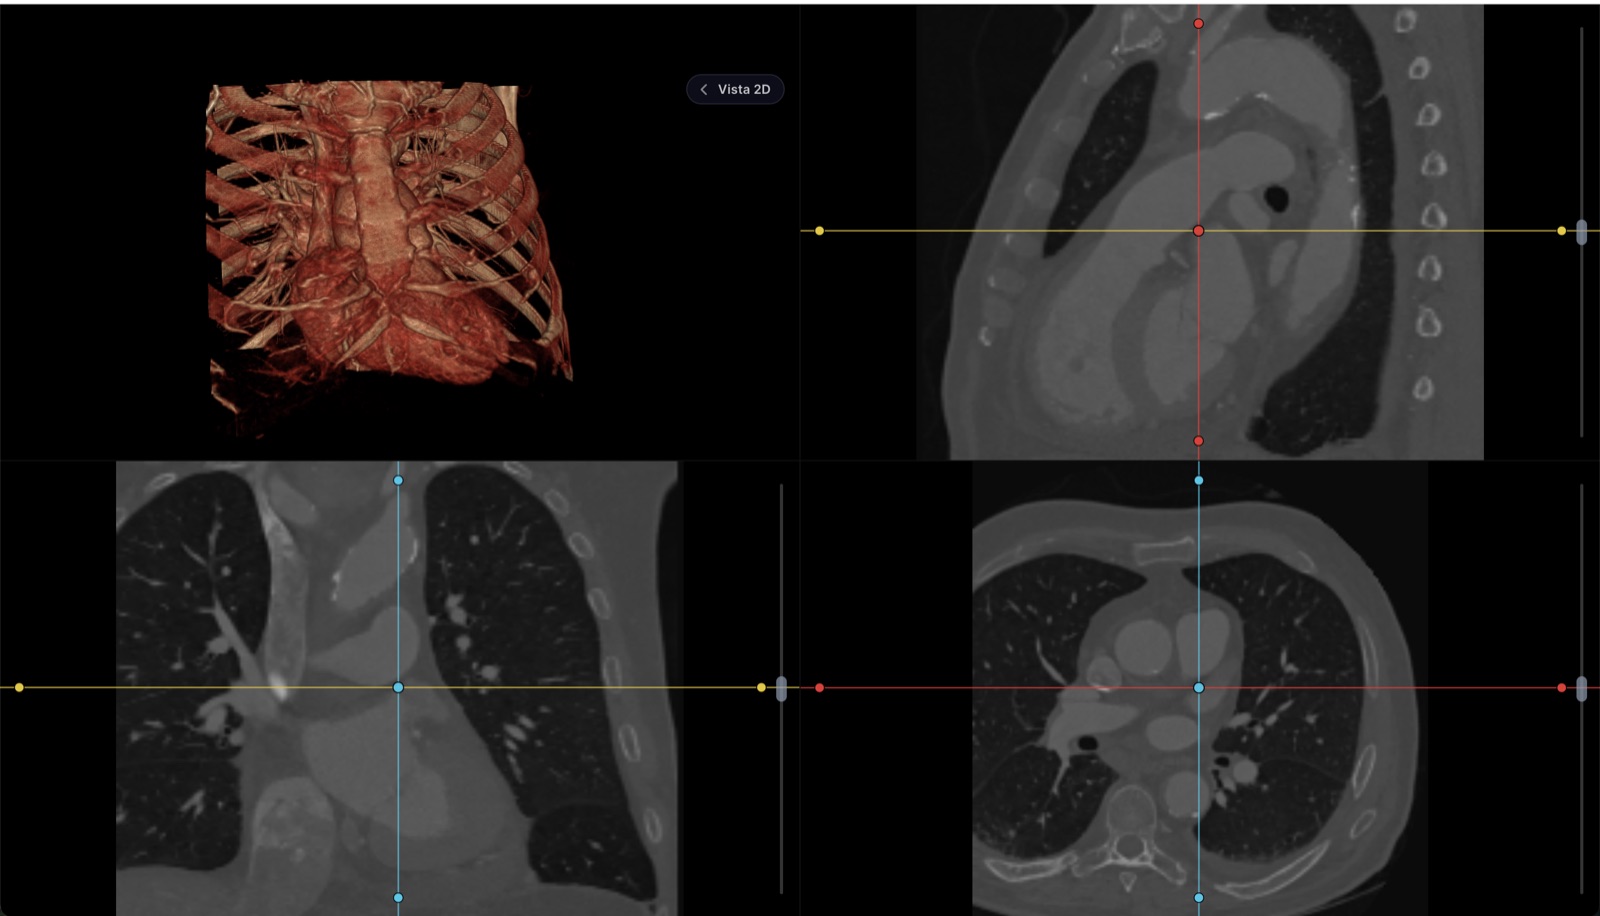
To view it, your study is not uploaded anywhere
The file is read and drawn inside your browser. It doesn't travel to our servers. Neither do your measurements or your report: they live in this tab's memory and vanish when you close it, so they leave no trace even on a shared computer. The only thing that leaves is what you choose to send: if you request the link for your doctor, the study is encrypted on this very device before upload, the key travels inside the link and never reaches us, and the file is deleted when it expires. We do keep a tally of the visit itself — how many files you opened, how much they weighed, how long it took to render and whether anything failed — so we know the viewer is doing its job; never the file names, never anything inside them.
Not for primary diagnostic reading
A formal diagnosis is issued on radiology-calibrated monitors. This tool is for reviewing, measuring, comparing and walking your patient through the study — not a replacement for the reading station.
Free, no account
View any DICOM or NIfTI series, or the PDF that comes on the CD
Window and level, zoom, cine and series comparison
Measurements in real millimeters, angles and annotations
Multiplanar reconstruction (MPR) and 3D view
Write the report and export or print it
Download your own files as a zip
Needs an account
Save the study to a patient's record
File the signed report next to the visit note
Keep measurements and key images across sessions
Receive studies straight from your machines via worklist
Share the study with the patient without burning a CD
Quick answer
What is on the CD, and what each thing is
When you open the disc in your file explorer you will see odd names and not a single file that looks like an image. That is normal: it is how almost every imaging center delivers a study. What is inside is this:
A folder called DICOM or IMAGES: that is where your study lives, in hundreds of files named like IM000001 that almost never end in .dcm and are still the slices of the CT scan.
A DICOMDIR file, with no extension: it is the disc’s index, not an image. This viewer does not need it, but copy it along with everything else.
An .exe program or a VIEWER folder: the viewer the imaging center included. It only runs on Windows, is usually old and unsigned, and is not worth installing — the images open without it.
Sometimes, a PDF: the radiologist’s report. Keep it aside; it is the first thing your doctor will want to read.
If you want to understand in depth what a DICOM file is and why your computer does not recognize it, it is explained in how to open a DICOM file. To view the study, no more theory is needed: follow the steps below.
From the disc to the screen, step by step
Copy the entire contents of the CD to your computer
Insert the disc, open it from the file explorer and copy everything to a new folder on your machine: the DICOM folder, the DICOMDIR and the PDF if there is one. Working straight off the disc is slow and, if it is scratched, it stalls halfway through the study. Once the copy is done, the CD has served its purpose.
Skip the program on the disc
There is nothing to install, least of all the .exe from the CD: it is the part that fails most often. The images are complete inside the folder you copied and any modern viewer reads them.
Drag the whole folder onto the viewer above
Click “Open my study” and select the files, or drag the entire folder onto the dotted area. On a computer there is also an “Open a whole folder” button that loads the study in one go. The viewer separates the series and sorts the slices by their real position, on your own machine.
Scroll through the slices and adjust the window
Move through the slices with the mouse wheel or in cine, and pick the preset for the tissue you care about: lung, bone, brain, abdomen. Without that adjustment a CT scan looks grey and flat. You can measure in real millimeters and open the reconstruction in three planes (MPR) and in 3D.
Save whatever you want to keep before closing
Everything lives in the tab’s memory: close it and nothing remains. If you wrote a report or want to keep an image, export or print it before leaving.
If your computer no longer has a CD drive
It happens more and more: laptops stopped shipping with a drive years ago and imaging centers still hand out discs. None of the ways out requires being an expert:
An external USB CD/DVD drive plugs in like any flash drive and is sold at electronics stores or online. It works for this study and for every one to come.
Ask the imaging center for the study on a USB flash drive or through its download portal. Your images live in its archive for years: handing them over again is routine paperwork, not a favor. If you are given a password-protected link, download it the same day — those links expire.
Use, just once, a computer that does have a drive — at work, a relative’s — to copy the disc to a USB stick or to your cloud. After that copy, the CD becomes a backup.
And one recommendation worth acting on right away: keep your own digital copy of the study together with the report PDF. A patient who arrives at the appointment with their complete imaging history saves the doctor half the questions.
On iPhone or iPad: compress it to ZIP first
On an iPhone or iPad the viewer works, but there is a system limitation: Safari does not let you select whole folders, and a CT scan is hundreds of files. The way around it is to compress the folder to a .zip and open that single file — the viewer unpacks it inside the browser.
Move the study folder to the phone
From the computer where you copied the CD, send it over AirDrop, iCloud Drive or whichever cloud service you use, until it shows up in the Files app.
Compress it from the Files app
Press and hold the folder and choose “Compress”. A .zip file appears next to the folder.
Open the .zip in the viewer on this page
Click “Open my study” and select the .zip from Files. The study is assembled on the phone; with very heavy CT scans the load takes a while and a computer remains the better screen.
Send it to your doctor without handing over the disc
Now that you have seen your study, the most useful thing you can do with it is have your doctor see it. From this viewer you can generate a link to share it whole: the file is encrypted inside your own device before it is uploaded, and the key that opens it travels in the part of the link after the “#” — the only part of an address the browser never sends to the server. What we store are bytes we cannot read. A link holds up to 600 MB, which covers a typical CT scan — a CD usually carries 50 to 300 MB.
The link expires after 72 hours and the study is deleted afterwards; if you lose it before your doctor opens it, there is no way to recover it — generate another one. It is a far more useful hand-off than screenshots over WhatsApp: your doctor receives the real slices, which can be measured and re-windowed. And if your doctor uses Healthy Record, the clinical record behind this viewer, they can upload those same files into your chart so that the follow-up scan six months from now is compared against this one.
Frequently asked questions
My computer no longer has a CD drive. How do I open the disc?
You have three ways out. The fastest: an external CD/DVD drive that plugs in over USB, sold at any electronics store or online. The second: ask the imaging center to give you the same study on a USB flash drive or through its download portal — studies live in its archive for years, so handing it over again is routine paperwork, not a favor. The third: use, just once, a computer that does have a drive (at work, a relative’s) to copy the contents of the CD to a USB stick or to the cloud; after that you never need the disc again.
Which folder on the CD should I open in the viewer?
The whole folder, not a single file. Inside the CD there is usually a folder called DICOM or IMAGES with hundreds of files named like IM000001: those are the slices, and they are all needed together to assemble the study. The simplest thing is to copy the entire contents of the disc to your computer and drag that whole folder onto the dotted area of the viewer; it separates the series and sorts the slices by itself. The DICOMDIR file is the disc’s index, not an image — this viewer does not need it, but don’t delete it when you copy.
Can I view my CT scan CD on an iPhone or iPad?
Yes, with one step first: compress the study to a ZIP. Safari on iPhone and iPad does not let you select whole folders, so first move the CD folder to the phone (over AirDrop, iCloud or whichever cloud service you use), then in the Files app press and hold the folder and choose “Compress”, and finally open that .zip in the viewer on this page: it unpacks it inside the browser. For a large CT scan, all the same, a computer’s screen and memory are the better fit.
I insert the CD and nothing happens, or the program on the disc (the “autorun”) won’t start. Is it damaged?
Almost never. What fails to start is the Windows viewer burned onto the disc: Windows 10 and 11 no longer run a CD’s autorun for security reasons, and on a Mac that .exe does not even exist as a program. The images are still there. Open the disc from your file explorer, copy the whole folder (usually called DICOM, IMAGES or named after the imaging center) to your computer and drag it onto the viewer on this page: the files are named IM000001 or similar, with no extension, and they are still DICOM. If the explorer shows the disc as empty or asks you to format it, then yes: ask the imaging center to give it to you again, on a USB stick or through its portal.
I got it from an imaging center, a hospital or a lab — is it all the same?
Yes. Large labs and imaging centers deliver the study on a CD, on a USB flash drive or as a download from their portal, and in every case the same DICOM files are inside, sometimes along with the report PDF and the Windows viewer. This viewer opens whatever you were given: the disc folder, the .zip or .rar from the download, or the loose files. If the portal only let you download “images” as JPG, those open here too, although without the millimeter calibration that DICOM carries.
Can I send it to my doctor over WhatsApp?
A photo of the screen or a JPG over WhatsApp works for a quick question, but it loses the resolution, the contrast window and the calibration: your doctor can neither measure nor change the window. What does work is generating the encrypted link here and sending THAT link over WhatsApp: it weighs nothing, opens in any browser without installing anything, and the study travels complete, encrypted on your device before it leaves. It expires after 72 hours and allows 5 openings; the file is deleted afterwards.
How do I send the CT scan from the CD to my doctor without handing over the disc?
From this viewer you can generate a link to share the whole study. The file is encrypted inside your own device before it is uploaded, and the key that opens it travels in the part of the link after the “#” — the part the browser never sends to the server, so what we store are bytes we cannot read. The link expires after 72 hours and the study is deleted afterwards; if you lose it, there is no way to recover it. It beats sending photos of the screen over WhatsApp: your doctor receives the real slices, which can be measured and re-windowed.